Showing posts with label Google AdSense Tricks. Show all posts

Friday, July 14, 2017

How to Erase Low CPC Advertisers From Google AdSense

Google Ad Sense can be a great way to create an advertising network through your company's website. This advertising network would be related to your services or products and earn advertising revenue while increasing your target audience. Users who click the ads will generate income for you, either through browsing or purchasing. However, you my want to tailor the types of advertising that appear on your site more toward your target audience by blocking or deleting ad entries. You only want advertisers that correlate with your client base and that maintain high cost-per-click revenue generation. Although you cannot erase advertisers from Google Ad Sense, you can block their ads from your site.

1. Log in to your Google Ad Sense account.
2. Click on the "Allow and Block Ads" tab.
3. Navigate your browser to the Google Keyword Research tool (see Resources). Research a few keywords to determine which ads, associated with which low-performing keywords, you might want to block.
4. Select "General Categories" from the menu on the left, and select what categories to block. This presents you with categories and specific subcategories you can select to block all ads associated with the categories. If a particular ad group performs low on your site, you can eliminate it through this option.
5. Click the "Ad Networks" menu and select any advertising groups associated with poor cost-per-click or keyword visibility to block them.
6. Click the "Advertiser URLs" menu and enter the full URL of any site that advertises poorly with low CPC, or is associated with low keyword visibility. Click the "Block URLs" button to block these URLs.

How to Use AdSense Code on Multiple Websites To Earn More

AdSense is a Google program for website publishers who want to earn advertising revenue on their websites. Once you have been approved for a Google AdSense account, you can use that account to publish ads on any of your business or personal websites, provided those sites adhere to Google AdSense terms and conditions. Although it's not mandatory, adding a Uniform Resource Locator (URL) Channel to your AdSense account for each website will make it easier to track your advertising revenue. You can also use Custom Channels to group your ads by design or location across multiple websites.

Adding URL Channels

1. Open a new browser window and log in to your Google AdSense account. Click the "My Ads" tab at the top of the page.
2. Select "URL Channels" from the Content section of the left menu.
3. Click the "New URL Channel" button. A new window opens.
4. Type the URL of each of your websites into the text box, placing each on a separate line. You can add up to 500 URLs. Click the "Add URL Channels" button when you are finished adding your websites. Once you have placed your ads on these websites, your AdSense report will break down the number of impressions, clicks and revenue received for each website.

Adding Custom Channels

1. Select "Custom Channels" from the Content section of the left menu if you want to track groups of ads on one website or across multiple websites. For example, you can use a channel for all banner ads, all ads on pages with similar content, or all ads of the same color scheme, etc.
2. Click the "New Custom Channel" button. Type a name for the channel in the "Name" field. Select any ad units you have already created from the list to add them to the channel.
3. Click the "Save" button. You can create up to 500 custom channels. Once you have added ads to a channel, your AdSense report will display the impressions, clicks and revenue for each Custom Channel.

Adding Ad Units

1. Click the "Ad Units" link in the Content section of your AdSense page.
2. Click the "New Ad Unit" button at the top of the page.
3. Type a name for the ad unit in the "Name" text field to help you identify this ad from others you create.
4. Click the "Ad Size" menu to select a size for the ad. Click the "Ad Type" menu to select text ads, image/rich media ads or both.
5. Select one or more custom channels for the ad unit if desired.
6. Configure the style of your ad by selecting one of the displayed styles or by clicking "Use Custom Settings" to define your own style.
7. Click the "Save and Get Code" button.
8. Copy the code provided and paste it where desired on any page of your websites that conforms to the Google AdSense terms, conditions and policies.

Warning

  • Review the Google AdSense Terms and Conditions and the AdSense Program Policies before placing ads on a new website. For example, each website must have a Privacy Policy statement, cannot display pornography or promote alcohol or firearms, etc. If any website violates Google's terms, your account may be terminated.

Tuesday, July 11, 2017

Get Free Permanent USA Number for account verifications

USA number have many benefits like registration on sites which are limited only to US citizens and other sites which require mobile verification such as Facebook, Paypal etc,  we can not share our personal number on these sites due to privacy reasons so we need an extra number for all online activities, many VOIP companies provide free USA number but they are available only for few months and after that they are assigned to some other one and if we need that number again we have to pay otherwise we will lose it, so why not get free permanent USA number for all of our online activities.
So if you need US number just follow this procedure and get a free number for a lifetime.

Procedure to Get Free USA Number

First of all you need a USA number for 5 minutes to get free US number for lifetime, first number will be used for verification required for free number, so you have to either buy a number from any VOIP company for few hours or get it from any of your relative who live in the USA, many VOIP companies give free number for few months, you can search these companies on Google or buy new number from Skype, it is only required once, once you have access to any USA number follow below procedure to get free number for lifetime.

Get free USA number for the lifetime?

  1. First of all install any free VPN or use Zenmate in your browser,
  2. After installation complete, change your country location to USA, Zenmate and many VPN have this option, as Google Voice is only available for US citizen only.
    zenmate-location-change
  3. Then open any browser and login to Gmail
  4. Go to Google VOICE and click on Get new number
    Google-Voice-new-number
  5. Google will ask you whether you need new number or you will use old one, here select new number
    Google-Voice-new-US-number
  6. They will ask you to give any other USA number for approval, here provide number you have obtained before
    add-forwarding-phone-Google
  7. They will make you a call and on that call you have to enter two digit number shown on your screen,
    verify-Google-voice-for-US-number
  8. After you verify your number they will assign you a permanent USA number in your account, you can use that number to make free call to US/Canada and also for online verifications, this number will be able to receive voicemails, calls and SMS, you can check your all incoming calls/SMS online.
The number will be free and permanent, but you should remember that this service is only limited for US/Canada citizens and we are not using it officially.

Saturday, July 8, 2017

How to Convert AdSense Hosted to Non-hosted Account

Before few year Google Adsens change his policy for Adsense account approval. They give different type of account; hosted account for google product and non-hosted account for publisher own wesbites.


AdSense hosted account is the one that is approved by partner sites of Google such as Blogspot, YouTube or HubPages.
AdSense non-hosted account is the one which you can use on any website that you own even if your account is on domains like .com, .net or .org.

Steps to Convert AdSense Hosted to Non-hosted Account

  • Sign into your AdSense account.
  • On the top right, you will see the gear icon. Click that and select settings.
  • On the left side select Site Access and authorization section and select Site authorization.
  • On the Show ads on other websites page that appears, enter the URL of the site where you plan to show ads.
  • Click Submit.

Add AdSense code to your website

  • Sign into your AdSense account. Now visit the My ads tab.
  • From the sidebar, choose Content.
  • Click +New ad unit button.
  • In the next step enter the name of your ad and customize it.
  • View details about the settings.
  • Click Save and get the code.

What to do if your application is disapproved ?

After few days You get an email about approval or disapproval your request. Even if your application is rejected, don't worry. You will be able to use Adsense on hosted sites like Blogspot or Youtube. You can always try again and again until you get approved.

Sunday, April 9, 2017

Best Adsense Ad Optimized Wordpress Theme To Boost Your Adsense Earning

Is that right?
Well, AdSense is an excellent way to make money online. However, to earn money from AdSense, you need to optimize things like ad placement, ad color & lots of other things.
You can always use any of these AdSense WordPress plugins, but there are many dedicated premium WordPress themes which help in increasing AdSense revenue.
These themes are created specifically to get a higher CTR on your ads and make sure your content is generating the highest paying ads.
I have created a collection of the best AdSense WordPress themes which you can use right now.
These themes come with strategic ad locations and lots of other subtle optimizations to make your website more suitable for displaying ads.
I will introduce you to the 11 best WordPress themes which are professionally optimized for AdSense. Go through the list one by one and find out which theme is the perfect fit for you.

Best Premium WordPress Adsense Themes For Higher Earning:

This is one of the newest & best AdSense WordPress themes to earn more from your ads. This theme comes with many advanced features which are very unique.
One of these features is an anti-adblocker technique that shows a pop-up to any visitor who has an ad-blocker add-on installed. It then asks the user to disable their ad-blocker for your blog.
The ad-blocker feature can be configured in many ways including the option to hide a single post’s content or simply showing a warning using a flyout.
This one theme comes with 8 beautiful, pre-defined layouts that you can use for a specific kind of niche blog.
  1. Tech blog
  2. Fashion blog
  3. Food blog
  4. Sports blog
  5. Baby blog
  6. Fitness blog
  7. News blog
  8. Online shopping blog
ad-placement
If you are looking for a theme that will help you generate more revenue from AdSense, this is the best WordPress theme for AdSense bloggers.
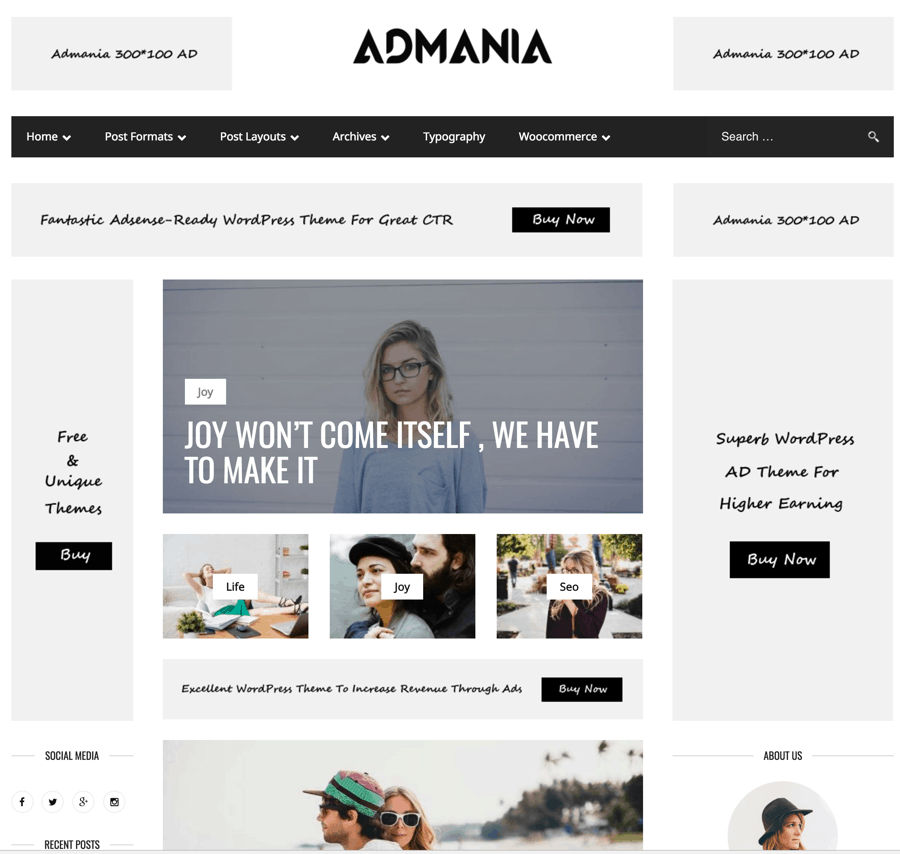
With over 241 sales on ThemeForest & an average rating of 5/5 Admania is one of the finest AdSense ready WordPress themes. This theme is appropriate for bloggers who are monetizing their blog with AdSense or any other contextual ad. One of the challenges that I have faced when adding AdSense to a WordPress blog is the option to add ads on the homepage.
Admania let you use the live editor to place the ad on the homepage. For example, if you wish to add ads between two posts on the homepage or on the sidebar, you can do that within seconds. This theme offers three different layouts to customize your homepage. Especially if you are creating multiple blogs, this one theme will give a unique identity to each of them.
What really interesting here is; you can add ad codes without any plugin. The theme ad panel is advanced & user-friendly. Apart from being AdSense friendly, Admania also have schema markup which is important SEO signals & is one of the fastest loading WordPress theme in the lot. The theme cost only $44 & developer support is already praised by existing buyers.
Truemag
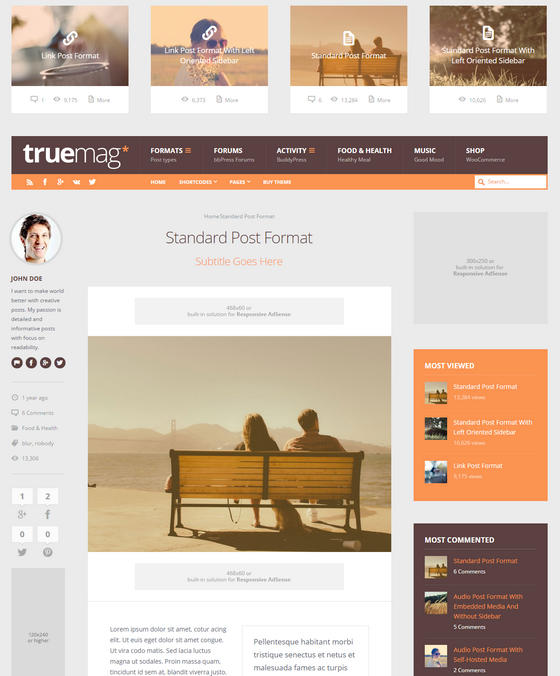
With a strong focus on monetization, Truemag is an excellent WordPress theme with a complete AdSense optimization. The different advertisement areas are located in various strategic hotspots which blend perfectly with the overall website design.
Besides the sidebar on the front page, there are several ad locations in the blog posts too.
The built-in AdSense ad units are completely responsive. That means your ads will be visible on all device types. As this retina ready theme comes with WooCommerce integration, you can easily integrate an online shop in your website too. You can also choose a custom layout, color skins, font icons, and unlimited sidebars from the theme’s options section.
Truemag is priced at $58.
Free Adsense WordPress Theme
IsleMag is a popular free WordPress theme which makes it easier for a blogger to monetize with AdSense.
This theme has been downloaded over 3000+ times & is a popular AdSense friendly magazine WordPress theme.
With a responsive design, you will be able to make the most out of your mobile & tablet traffic. However, I recommend you to use responsive AdSense ad units to maximize your AdSense earnings.
If you wish to highlight a specific post on your homepage, take advantage of the in-built Carousel Slider.
The thing I like the most about this theme is how frequently it gets updated to ensure compatibility with the latest version of WordPress.
If you are looking for a free magazine style AdSense WordPress theme, IsleMag is an ideal choice.
Grimag
Grimag is an excellent WordPress magazine theme for editors and publishers.
The theme developers have optimized Grimag for maximum monetization output. The available advertisement locations are strategically positioned to match the overall design. By using this theme, you can display attractive ads and earn a lot of profits from your content.
An interesting feature of Grimag is its fixed sidebar. You can easily display site-wide advertisementsby using the sidebar. The completely responsive layout of this theme makes sure that your website looks great on any screen size.
The retina-ready WordPress theme can be translated into other supported languages too.
The Grimag theme is priced at $48.
TruePixel
Featuring multiple ad locations on the front page, single posts, and pages, TruePixel is another attractive WordPress theme.
Being fully optimized for AdSense, this theme helps you to get a better CTR and CPC from your visitors. The glossy design of TruePixel makes it an excellent choice for creating news, magazine, and entertainment websites.
The fully responsive theme is provided with a large “featured” section which could be used to showcase popular or recent posts. This speed-optimized theme will also load pages quickly, helping you to get better search engine ranking and deliver an improved user experience.
You can get the TruePixel theme for $45.
NewsOnline
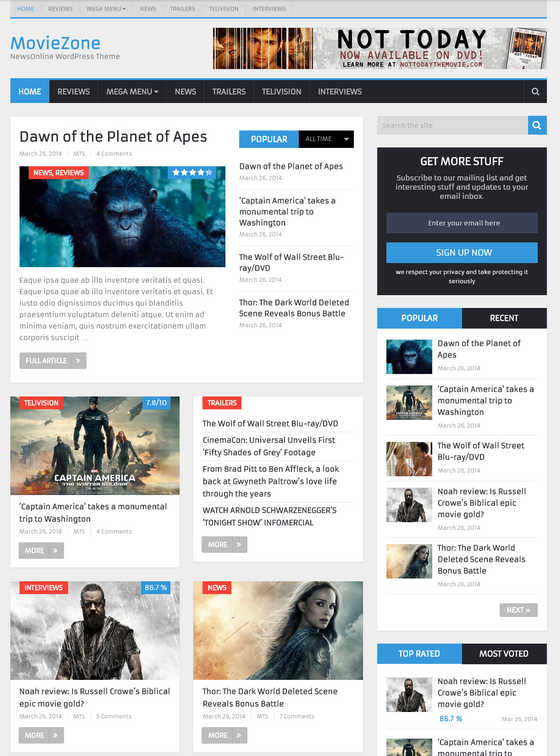
The fully responsive NewsOnline theme is provided with a unique mix of style and elegance.
The eye-catching design of this theme lets you attract the attention of your visitors instantly. If you want to display a lot of content on your website and want to make some money from it, this could be an excellent choice for you.
NewsOnline includes cleverly positioned ad spaces which do not distract visitors while making sure that you are getting maximum conversions. This SEO-optimized theme also comes with parallax effects, an off-canvas mobile menu, social media buttons, and lots of shortcodes.
You can get the NewsOnline theme for $45.
GoMedia
If you are looking for a news, magazine, or blog theme with special ad locations, GoMedia could be the perfect choice for you.
By default, the home page contains four ad locations. It is possible to disable any of them and/or add new ad locations in other places of your website.
The advanced control panel of this theme lets you control various settings of your website all from one place. The theme package comes with several custom widgets including Twitter and Flickr. You will also be able to choose from the custom page templates for full width, archive, and other pages.
The GoMedia theme costs $49.
Nominal
If you want a simple WordPress theme for your next blog site which will also show some advertisements, you should definitely consider Nominal as one of your top choices.
The default layout of this theme includes an HTML or image banner right below the menu and on top of the right sidebar. If your blog has sponsors, you can easily show them in the sidebar.
Besides the default ads, you can use the custom widgets to place ads in various locations without having to edit the theme code. This SEO-friendly theme is also optimized for loading your pages in the quickest time possible.
You can get the Nominal theme for $45.
DizzyMag
With a large advertisement location on top of the site and another two ad locations in the home page, DizzyMag is an excellent AdSense-ready magazine, news, or blog theme for WordPress.
The responsive ad units and strategic hot spots will help you to maximize your monetization efforts.
DizzyMag also comes with a full-featured review and ratings system. By using this feature, you can easily publish an in-depth review of your favorite products and/or services. As the theme also supports WooCommerce, you can also include an online shop in your website.
The feature-rich DizzyMag theme is priced at $58.
Goliath
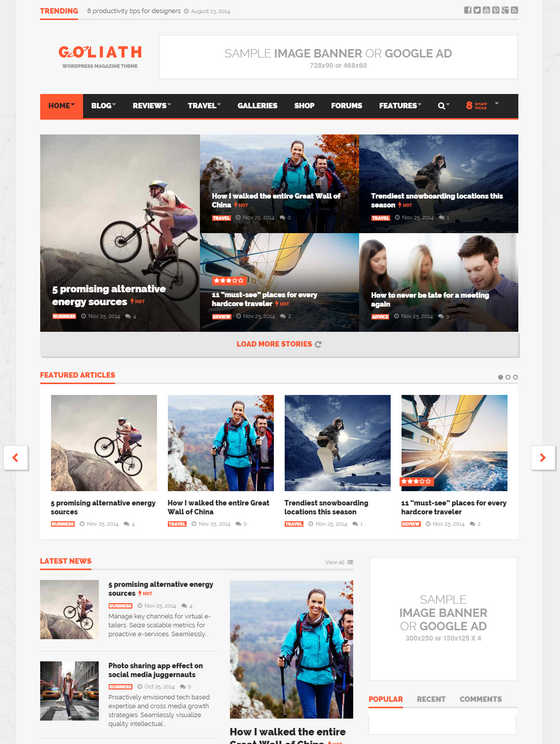
Goliath is a fully responsive ad-optimized WordPress theme for creating beautiful magazine WordPress sites. The integrated control panel lets you display Google AdSense or other ads in three dedicated locations on the home page. As this theme comes with Revolution Slider and Visual Composer, you can easily create eye-catching layouts for your visitors.
The theme package includes a rating system, summary features, and enhanced review display options.
This multi-lingual theme also comes with full WooCommerce and bbPress support. As the theme package includes the PSD files, you can easily customize the look of your website.
You can get the Goliath theme for $58.
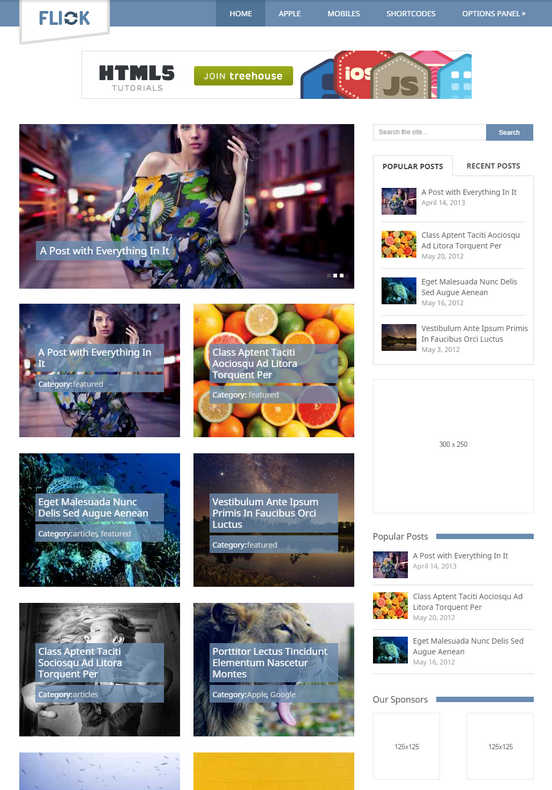
12. Flick
Flick
Flick is a minimal, simple WordPress theme for creating blog, personal, or portfolio sites with cleverly positioned ad slots. The top banner, sidebar ad location, and the sponsors section blend perfectly with the overall design. If you are looking for a theme with a strong focus on media, this could be an excellent choice for you.
Based on Twitter’s Bootstrap framework, Flick is a fully responsive and SEO optimized theme for providing your site with maximum search engine exposure. The powerful options panel of this theme lets you customize various settings of your website. You will also find the custom widgets very useful.
You can get the Flick theme for $45.

Which AdSense WordPress theme is right for you?

Now that you have gone through the list of AdSense optimized themes for WordPress, which one(s) do you like the most? Did you find any theme which you are planning to use for your next website?

Thursday, March 16, 2017

How to search for high paying keywords using Google AdWords Keyword Tool

Targeting for high paying keywords in Google AdSense would help you earn more by getting higher cost-per-click ads for your website. One of the method to searching for the high paying keywords is by using Keyword Tool in Google AdWords.

To search for the high paying keywords, go to the Keyword Tool's website and follow these steps.
The first step is to search for a base keyword that you want to target. In this example, adsense is used.

Insert word or phrase

Enter the keyword adsense in the Word or phrase textarea. you can insert more than one keyword, one per line.

Verify captcha

Fill in the word as in the captcha image to verify that you're human and not automating your keyword search.

Enable Estimated Avg. CPC column

To see the CPC of each keywords, you'll need to enable the Estimated Avg. CPC column. To do this, select the option from the select list on the upper right of the result table and click Apply

Search

Click on the Search button to start searching.

Result

You'll get the result somewhat as the following. Do note the estimated average cost per click on the right side of the table.

Sort

The result by default will display keyword suggestions based on the relevancy of the keyword being search. You'll want to sort it out based on the average CPC.

Sort by Estimate Avg CPC

To do this, click on the Sorted by relevance select list on the result table header, and choose Estimated Avg. CPC.

Result

The result is now sorted based on the highest acerage CPC. You can start targeting your website for the keyword on top of the list.

Video tutorial


How to do section targeting in Google AdSense

Google AdSense crawler crawls your website and tries to extract keywords from your pages. While Google generally performs the task well, you can help them to do it better. This is because certain part of your site is not always related to the content of the page. This normally includes the sidebar, footer, and sometimes maybe the comment section if you're running a blog.
Section targeting will help Google AdSense to serve ads more relevant to your site's content, which normally means higher click-through rate (CTR) thus increasing your AdSense income.
Section targeting allow us to emphasize specific part or section of our page for Google AdSense. To implement it, you need to add some HTML tag to mark the start and the end of the section that yo want to emphasize.

Here's the HTML tag to emphasize a page section:
<!-- google_ad_section_start -->
.......
<!-- google_ad_section_end -->
You can also specify a section of our page to be ignored. This is normally applied to the sidebar and the footer section of the page.
<!-- google_ad_section_start(weight=ignore) -->
.......
<!-- google_ad_section_end -->

How to find high paying keywords for Google AdSense

One of the most important step in increasing the cost-per-click for your AdSense ads is to target for the high paying keywords. This is because Google AdSense works by advertisers bidding on keywords on Google AdWords programs, where not all keywords get bid the same.
To put it simply, the popular keywords get high bids, and the less popular keywords gets low bid. To have the high paying keywords in your website's content would then mean having high paying ads served via the AdSense program.
There are few ways to search for high paying keywords for Google AdSense. Some of the are listed below.

1) Google Adwords Keyword Tool

There's nothing better than a tool from Google itself. Google Adwords Keyword Tool is initially a tool for Google AdWords advertisers to get insights on keywords targeting by displaying relevant information about searched keywords such as the search volume, Google AdWords advertiser competition, and of course, the CPC.

2) Market Samurai

Market Samurai provides the same solution as the Google Adwords Keyword Tool, except that it's a Windows program and is not free. Free trial is available.

3) Keyword Country

This online tool give keyword suggestions along with estimated search volume and competition for the particular keyword, but doesn't give the CPC for each keywords. It is still a good tool though as you can always relate to high competition as high paying keywords.

4) WordTracker

WordTracker keywords tool is a paid service for something Google Adwords Keyword Tool give for free.

How to display more relevant ads in Google AdSense

Google AdSense works by displaying ads relevant to a page. To get relevant ads, Google AdSense crawler crawls your site and extract keywords from the pages it visit. When a visitor visits a page on your site, Google will serve ads based on the extracted keywords that Google AdWords advertisers bid on.
With that in mind, it's important for Google AdSense crawler to get the right keyword from your page, as if it doesn't, it will either display irrelevant ads or worst, PSAs or Public Service Avertisements. Irrelevant ads gets less click from your site's visitors, and PSAs don't pay at all.
Keyword targeting for Google AdSense in a sense is similar to keyword targeting in SEO or Search Engine optimization, with some unique targeting features of its own.

1) Page Content

Your page's content is where most of the keywords would come from. Try to repeat keywords that you want to target, but don't overdo it as it'll be unnatural to your site's visitors and would just drive them away. Even worse, you could be tagged for keyword spamming by Google.

2) Site title

Site title should be definitive. Using Page 1, Untitled, or anything similar doesn't has any keywords that could help you serve relevant AdSense ads. If your page is about AdSense, remember to have AdSense somewhere in the title.

3) Image

AdSense crawler doesn't crawl images, but they sure can read your <img> tags. Use meaningful name for your image, and be sure to include meaningful description, or alt text to your image as well.

4) Section Targeting

Section targeting is an AdSense feature that allows you to emphasize certain part of your page in keywords targeting. You can also use section targeting to ignore certain section of your page such as the sidebars or the footer.

5) Meta tags

Meta tags are some information inserted in the <head> area of your site. It's not visible in page when rendered by web browsers, but is useful for robots crawling your site. While the meta tags are no longer used for SEO, it's still applicable in targeting your site for more relevant AdSense ads.
The 2 meta tags you can use for targeting is the keywords and description tags. You can enter keywords relevant to the page in both meta tags, though the description should be in more human-readable form.
<meta name=”keywords” content=”keyword1 keyword2“>
<meta name=”description” content=”Description of your site“>

6) Interest based advertising

Google by default serve ads based on your visitor's browsing history in what they call as interest based advertising. This aims to serve more targeted ads for AdSense, but it can give adverse effect, depending the nature of your site.

7) Competitive Ad Filter

If you have implemented all the above tips but there are still some ads that you don't want to appear in you page, you can just use the Competitive Ad Filter feature.

Wednesday, March 15, 2017

How To Get Your Google Adsense Account Unbanned Easily

I know the feeling, one day you wake up in the morning, checking your emails and suddenly you read that your adsense get banned. What the hell is going on? But don’t worry. I will show you how to get your google adsense account unbanned very easily.
In this post you will learn how you can get back your adsense account, your hard work and all the money you earned from blog via Google adsense. Google is very strict and monitor each and every account details in depth.

How Did Your Adsense Account Get Banned?

The answer is simple, there are so many reasons that your adsense account banned but probably two main reasons this happened:
  1. You have clicked on your ads
  2. Somebody else has done click bombing on your site. Click bombing is usually done by your blogging enemies.

How To Get Your Google Adsense Account Unbanned?

Below is 5 steps process to get your google adsense account back easily:

The Five Steps To Get Unbanned From Google Adsense:

  1. Try to find out why your account was banned: Google always gives a reason to ban your account. Google mainly gives reason like invalid clicks. Use Google analytics to find some strange activity that is going on your blog, If you succeed in tracing an IP, you will easily get your adsense account unbanned.
  2. Contact Google team by filling up the form they provide: Try to be nice while answering, give solid proof to them. Provide them those IPs that you found from analytics. If the invalid clicks are from them, you will receive your account back. Here is the link to Google Adesense Invalid Activity Appeal Form: https://support.google.com/adsense/contact/appeal_form.
  3. Provide solid evidences: Google will not give your account back without any proper evidence you provide. Try to figure out why did you lose your adsense.
  4. Keep your calm: Let Google make proper research and if you have provided proper proof and you are innocent, you will receive your adsense account back and this all will only happen if you keep calm.
  5. Persistence will surely help: If you lose your confidence after only just a mail or two,it would be difficult to receive your account back. Make sure you mail them with proper proof again and again and keeping your side heavier.
Following these tips will surely help you to get your adsense account unbanned and make sure you have the will to fight against it. Google will sure give your adsense account back if you are innocent by your side.

Recent Improvement In Google Adsense Account Ban Process

Google has announced that they have made changes in the process they use to suspend adsense accounts, ban publishers as well as in the appeal process for getting adsense account unbanned.
The changes include:
  • Google will now look at the age and may only suspend instead of terminate the publisher while working with that publisher to fix that issue.
  • A new and more detailed appeal form will be given to the user to get his google adsense account unbanned.
  • Google will be less strict to the innocent people.
We are not providing any type of guarantee that you will 100% get your google adsense account unbanned but giving you the tips we have been using and other bloggers have been using. Believe in yourself if you are true. Best Of Luck My Friend..!!

10 Tricks to Boost Adsense Earnings; Increasing CPC & CTR

After getting the Google Adsense account approved, the thought that comes to the mind of every blogger is ‘how to optimize adsense ads?’.  After adsense ads starts displaying on our sites, we feel that we have done everything. But, many of them will have CPC of  just 1 to 30 cents. But, if you can optimize the adsense units effectively, you can increase your CPC from mere cents to several dollars.

Adsense Optimization techniques for higher CPC and CTR

1. Change adsense ad layouts to find out which one best suits your site. A placement strategy which works well in one site need not work better in another. So, don’t worry. Just change the ad placement and watch the change in adsense earnings.
2. Use maximum number of available ads(3 standard ad units image/text, 3 link units and search bar) possibly in most of the pages. But, you should do it carefully such that the user should never get a feeling that the site is full of ads.
3. Use more standard text ad units as it gives higher CPC than image ads.
4. Implement highest paying ad sizes(Large Rectangle-336×280, Leaderboard-728×90, Medium Rectangle -300×250 and Wide Skyscraper -160×600).
5. Try different ad layouts in each post. That is, in case of a 300×250 ad unit, if it is placed at the begining of a post, just push it to last in the next post and so on.
6. Change the ad colour in link ad units and text ads(colour used for hyperlink usually give better results).
7. Ad Targeting: If you are using the same ad unit in all pages(eg 728×90 ad), target the ad. It will increase the Cost Per Click(CPC) of that ad unit. For that open adsense homepage. Click on ‘My ads’ tab. Go to ‘Custom channels’. Click on ‘New custom channel’. From there select the ad unit, give a name and tick on Targeting and fill the boxes below. Now, it’s all done. Analyse the changes in earnings in a week or two.
8. Switch to responsive WordPress themes. Since mobile and tablet users are increasing day by day, responsive themes play a crucial role for more traffic and for getting more adsense earnings.
9. Don’t place all the 3 ad units above the fold. This can decrease your adsense CPC.  It is true that you can get more clicks by placing ads at the beginning. But, from my experience it will lower your adsense CPC. Another advantage of this policy is that you can increase your site speed. Lowering Javascript above fold will decrease the page load time and is good for SEO as well.
10. Use responsive adsense ad units. Responsive adsense units are ads that are capable of changing their size according to the maximum available area where the unit is placed. For example, if you have a sidebar 400px in width and you have placed a responsive ad unit there. The ad unit will display 300*600 or 360*280 or 300*250 or other automatically. Moving to responsive ad units will dramatically increase adsense earnings(cpc and clicks) from tablets and Smart phones. I gave these units a try and found it great. But, moving all the  ad units to responsive mode is not a good idea. The only condition you should follow is that never place a responsive ad unit before title. Since when viewed from mobile platform, it will show large ads which is against Adsense TOS(Content should be served first).
Above all this, try to visualize your site as a user visiting the same, and try to exploit the chances so that you get more clicks.(Place ads where they would surely notice). This will surely increase your CTR.
Now, this is my word for you.
“Never get carried away by the success stories of fellow bloggers and website owners. Every one will have their time. Just do experiments on your ad arrangements, wait and see whether it works(say for 3 to 4 days or a week). If it fails, try another. Surely you will see a boost in your adsense earnings soon.”